I’m no stranger to altering my costumes. Often after a first wearing there are fitting tweaks I want to make, but I’ve also retrimmed gowns, or completely remade them in the past, or even cut up old dresses to reuse the fabric for an entirely different project. However, with this project I tried something I’ve been thinking about for years. I updated an existing 18
th century gown to reflect the new fashionable 1790s silhouette, copying specific alterations I’ve seen on extant gowns. In this case, I took
my mid-1780s blue stripe gown which no longer fit, and altered it to a 1790–4 shape.
For the new style, I was inspired by
several portraits and multiple fashion plates featuring dresses with wide cross-lacing across the center front, sometimes over self-fabric, sometimes over a contrasting panel. They all have a slightly raised waistline that is either straight across or has a slight curve in the front. Finally, most have the long, tight fashionable sleeves and a matching petticoat. However, one portrait showed both elbow length sleeves and a contrasting petticoat. Since I only had a few small scraps of fabric left, definitely not enough for a new petticoat or new sleeves, I used this as my main inspiration when styling my dress. Throughout the entire project, I tried to keep the mindset of a thrifty 1790s seamstress who wanted a fashionable new gown but had very limited resources.
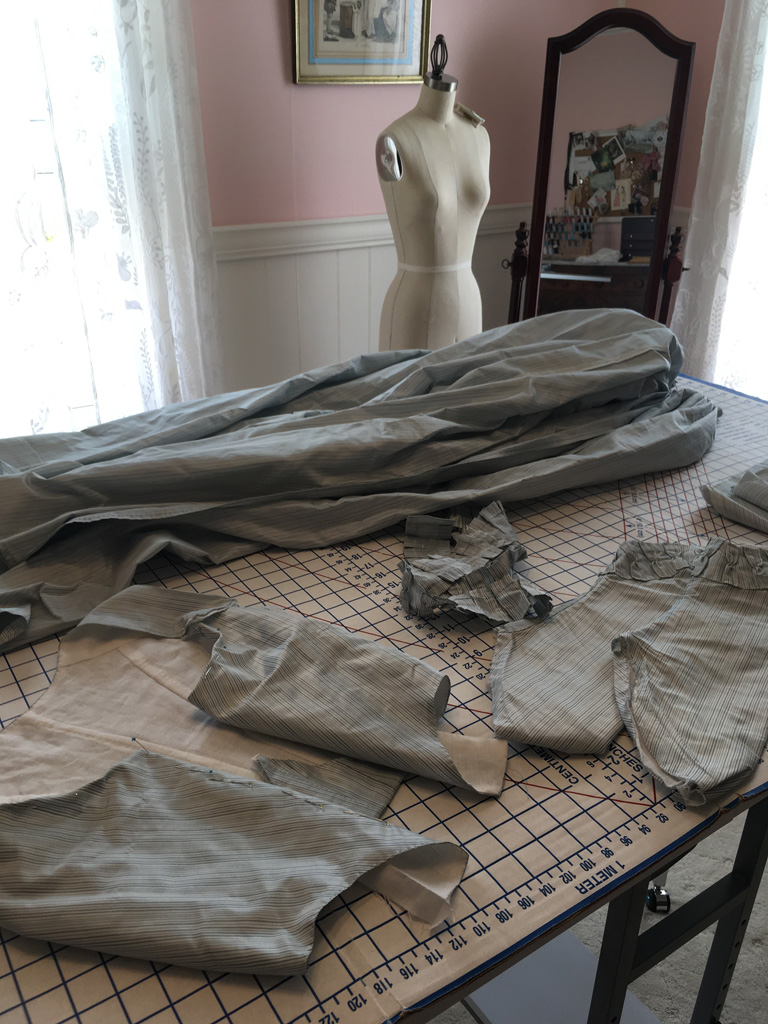
I started by picking apart the old dress, removing the neckline trim, the sleeves, and the skirt. Since the dress was hand sewn, this step was very quick and easy. Next, I refit the bodice over my newer late 1780s stays. These have a wider bust and a higher waist, so I needed to raise the bodice about 2 inches at the shoulder straps and adjust the neckline.
For the center front, I opted to have a wide gap that laced over a separate little stomacher. While I don’t have specific evidence that this was done, it was the most economical use of my scraps and seemed like a plausible construction method. The excess fabric at the front was turned in and the bottom raised and shaped with a slight point. I tried to leave as much fabric as I could for any future adjustments, but I did have to trim some of the excess fabric from the original front point to reduce bulk. To keep the edges from warping with the lacing, I added a piece of boding in the lining at each side, slightly inset to leave room for the eyelets, which were stitched into just the lining of the dress. I waffled between putting the eyelets in just the lining or both layers. There were clear examples of both in portraits, but choose to do just the lining to make it less permanent. Unfortunately, the stress of the lacing in just the linen causes some weird wrinkles, and I think it might be better to go back and work the eyelets through the silk, too, to get a smoother fit next time I wear the dress.


The stomacher is just a small rectangle of silk, straight at the top and sides and gently curved at the bottom, backed with linen. This gets pinned to the stays and the dress is then laced over.
The sleeves gave me so much trouble, surprise, surprise. They didn’t fit great on the original gown and trying to fit them into the new armscythe was a pain. They still aren’t perfect, but at some point you have to stop fiddling to save your sanity. I had hoped to add a new collar and cuffs to the dress, like my inspiration portrait above, but I just didn’t have enough scrap fabric to make it work. So I added the pleated trimming back, leaving the bottom edge loose like a ruffle.


Once I had the bodice altered, I re-pleated the skirt panels and mounted them just above the finished edge of the bodice. The original back point was left intact and free on the inside of the skirt. When I was in England a couple of years ago, I was lucky enough to examine two dresses at the Fashion Museum in Bath that were altered in this same way. Unfortunately, I can’t share photos from the study session, but it’s one of the things that sparked my inspiration for this project. The little back flippy-flappy, as I like to call the old back bodice point, is one of my favorite details. I love how multiple seamstresses couldn’t be bothered to finish the edge, or as Carolyn of
The Modern Mantua-Maker pointed out, perhaps they weren’t sure this new high-waisted look would stick around and maybe they would want that extra fabric some day?
When I wore this dress to a delightful Scarlet Pimpernel themed dinner last September, I accessorized it a large fichu, my poufy cap thing I made years ago, and giant pearl hoops from Dames a la Mode. I also wore my custom 1780s wig from Jenny la Fleur. The front is laced with pale grey silk ribbon and the petticoat is the same petticoat I previously wore with it, only with the box pleated ruffle removed to bring it up to date with the latest 1790s fashions.
Posted:
12/30/2018 12:49:37 PM by
Aubry | with
comments